Python Bindings for Raylib 6.0
Libraries: raymath, raygui, rlgl, physac and GLFW
Backends: Desktop, SDL, DRM, Web, Software rendering
Platforms: Windows, Mac, Linux, Raspberry Pi, Web

HELP WANTED: writing examples
Features:
CFFI API static bindings.
Automatically generated to be as close as possible to original Raylib.
Faster, fewer bugs and easier to maintain than ctypes.
Commercial-friendly license.
Docstrings and auto-completion.
Type checking with Mypy
Quickstart
pip3 install raylib==6.0.1.0 --break-system-packages
from pyray import *
init_window(800, 450, "Hello")
while not window_should_close():
    begin_drawing()
    clear_background(WHITE)
    draw_text("Hello world", 190, 200, 20, VIOLET)
    end_drawing()
close_window()
Use the project generator to generate a complete project. Example of project
Videos
FinFET - Making a simple 3D game in Python (for real) with Raylib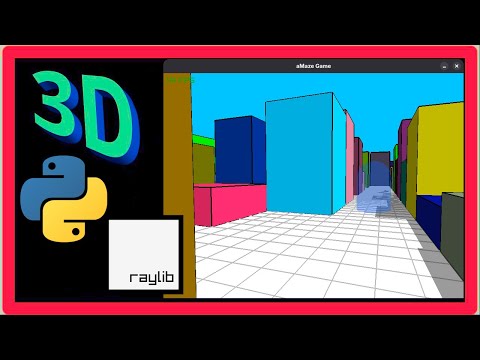
Clear Code - The ultimate introduction to Raylib
Unconventional Coding - I Made My Own Video Editor Because Kdenlive Is Too Slow

Links
Installation
If you are on a modern Linux you will probably want to create a venv:
python3 -m venv venv
source venv/bin/activate
Then make sure you have the latest pip installed:
python3 -m pip install --upgrade pip
Then install
python3 -m pip install setuptools
python3 -m pip install raylib==6.0.1.0
On most platforms it should install a binary wheel. If yours isn’t available then pip will attempt to build from source, in which case you will need to have Raylib development libs installed, e.g. using homebrew, apt, etc.
Windows
Binaries require x64 or x86 Windows 10 or newer.
Use an official Windows Python release rather than WSL, MSYS, etc.
MacOS
Binaries require:
arm64 MacOS 14
x64 MacOS 10.13, or newer.
Older MacOS requires building from source but this is usually simple:
brew install pkg-config
brew install raylib
python3 -m pip install raylib==6.0.1.0
Linux
Binaries require OS newer than Ubuntu 2016, x64/x86 or Ubuntu 2022 arm64. Otherwise build from source. (Pip should attempt automatically but will need Raylib itself installed and also pkg-config.)
The arm64 binaries are built on Raspberry Pi arm64 Bullseye with OpenGL 2.0 so may not work on other boards.
Raspberry Pi
Using on Rasperry Pi
Backends
Dynamic binding version
There is now a separate dynamic version of this binding:
python3 -m pip uninstall raylib
python3 -m pip install raylib_dynamic
It works on some systems where the static version doesn’t, but be sure to read these caveats before using it
You can’t have multiple raylib packages installed at once.
SDL backend
This is not well tested but has better support for controllers:
python3 -m pip uninstall raylib
python3 -m pip install raylib_sdl
You can’t have multiple raylib packages installed at once.
DRM backend
This uses the Linux framebuffer for devices that don’t run X11/Wayland:
python3 -m pip uninstall raylib
python3 -m pip install raylib_drm
You can’t have multiple raylib packages installed at once.
Problems?
If it doesn’t work, try to build manually.. If that works then submit an issue to let us know what you did.
If you need help you can try asking on our discord. There is also a large Raylib discord for issues that are not Python-specific.
If it still doesn’t work, submit an issue.
How to use
There are two modules in the raylib package, raylib and pyray. (There is no separate package for
pyray. Do not pip install pyray). You can use either or both:
If you are familiar with C coding and the Raylib C library and you want to use an exact copy of the C API
Use the raylib module.
If you prefer a more Pythonistic API
Use the pyray module.
Running in a web browser
Pygbag >=0.8.7 supports running in a web browser. Usually the latest git version is recommended.
Make a folder my_project with a file main.py:
# /// script
# dependencies = [
#     "cffi",
#     "raylib"
# ]
# ///
import asyncio
import platform
from pyray import *

async def main():   # You MUST have an async main function
    init_window(500, 500, "Hello")
    platform.window.window_resize()  # You MAY want to add this line
    while not window_should_close():
        begin_drawing()
        clear_background(WHITE)
        draw_text("Hello world", 190, 200, 20, VIOLET)
        end_drawing()
        await asyncio.sleep(0) # You MUST call this in your main loop
    close_window()

asyncio.run(main())
Then to create the web files and launch a web server:
python3.12 -m pip install --user --upgrade pygbag
python3.12 -m pygbag --PYBUILD 3.12 --ume_block 0 --template noctx.tmpl --git my_project
Point your browser to http://localhost:8000
Some features may not work, so you can disable them like this:
if platform.system() != "Emscripten":  # audio may not work on current version of emscripten
    init_audio_device()
This is all done by Pygbag rather than by me, so you should probably contact them with any issues. Carefully read all their documentation.
It does work for most of these examples
Startup without printing anything
import logging
logging.basicConfig(level=logging.ERROR)
import pyray
pyray.set_trace_log_level(pyray.LOG_ERROR)
pyray.init_window(100,100,"test")
App showcase
Add your app here!
RLZero
A related library (that is a work in progress!):
A simplified API for Raylib for use in education and to enable beginners to create 3d games
Help wanted
Converting more examples from C to Python
Testing on more platforms
License
Eclipse Public License, so you are free to statically link and use in non-free / proprietary / commercial projects!
Performance
If you need more performance, do in this order:
Use Pypy rather than standard CPython. It is much, much faster and will make more difference than any other optimisations you might do.
Every call to C is costly, so it’s slightly faster if you use Python data structures and functions when calculating in your update loop and then only convert them to C data structures when you have to call the C functions for drawing.
The raylib.* functions are potentially slightly faster than the pyray.* equivalents, so if you need a tiny bit more performance you can switch your inner loop functions to these.
There is a version of Python that is faster than Pypy: GraalPy. However it’s not fully compatible with all Python packages. It doesn’t work with CFFI and so doesn’t work with this binding. But it is compatible with the Java binding, Jaylib! There is an example of this here: https://github.com/electronstudio/megabunny/tree/master/raylib-python-jaylib
Bunnymark
Library |
Implementation |
Bunnies (60 FPS) |
Percentage |
|---|---|---|---|
Raylib 5.0 |
C |
180000 |
100% |
Raylib Python CFFI 5.0.0.2 |
Python 3.12 |
10500 |
5.8% |
Raylib Python CFFI 5.0.0.2 |
Pypy 3.10 |
95000 |
53% |
Raylib 3.7 |
C |
168100 |
100% |
Raylib Python CFFI 3.7 |
Pypy 3.7 |
33800 |
20% |
Raylib Python CFFI 3.7 |
Python 3.9 |
7700 |
4.5% |
Raylib Python CFFI 3.7 |
Python 3.9 Nuitka |
8600 |
5.1% |
Raylib Python CFFI 3.7 Dynamic |
Python 3.9 |
6300 |
3.7% |
See also https://github.com/electronstudio/megabunny/
Packaging your app
You can create a standalone binary using the Nuitka compiler. For example, here is how to package Bunnymark:
pip3 install nuitka
cd examples/textures
python3 -m nuitka --onefile --linux-onefile-icon resources/wabbit_alpha.png textures_bunnymark.py
Advert
RetroWar: 8-bit Party Battle is out now. Defeat up to 15 of your friends in a tournament of 80s-inspired retro mini games.
Coding Games With Pygame Zero & Python is a book for Python beginners.
Hall of shame!
Apparently comma.ai are now using raylib-python-cffi commercially and so have begun donating money to raylib but have chosen not to give anything to raylib-python-cffi. Yes it’s perfectly legal usage, but it’s not very nice behaviour. 😔